Kegerator Coupler Parts: Essential Accessories for Your Home Keg
Curious why your draft beer ends up too foamy or disappointingly flat? It all comes down to the tiny yet powerful parts that link your keg and tap. If you don’t have the proper hardware, even a great beer can go flat and lose its taste.
At Installation Parts Supply, we know that a smooth pour starts with quality hardware. Whether you’re a homebrewing enthusiast or just love fresh draft beer, understanding these keg parts diagram pieces ensures every glass is served just right.
Every part—from the washers to the gas lines—matters for keeping the right pressure and taste. More than nine out of ten pour problems stem from mismatched or worn parts. With a bit of know-how, you can keep your setup working without a hitch.
Critical Findings
- The correct coupler choice means perfect carbonation and flavor.
- Installation Parts Supply provides reliable plumbing solutions for draft systems.
- Routine upkeep stops most draft issues.
- The style of coupler depends on the beer you’re pouring.
- Coupler faults are behind most draft system breakdowns.
Define the Kegerator Coupler
The perfect draft beer starts with the right connection between your keg and tap. Think of the keg coupler as the connector between your CO₂ cylinder or nitrogen tank and the beer line, employing pressurized gas to deliver beer flawlessly to your taps. Think of it as the engine of your draft beer system—without it, nothing flows.
It both pumps gas in to pressurize your keg and regulates how the beer exits. Its interior consists of a probe, a check valve, and distinct ports for beer and gas. Together, they keep your beer fizzy and antifoam.
| Component | Role | Frequent Problems |
|---|---|---|
| Probe | Pierces the keg’s cap | Misalignment causes leaks |
| Check Valve | Stops beer from flowing backward | Flat pours from worn seals |
| Gas/Liquid Ports | Links to tubing | Loose fittings create foam |
Attaching the coupler wrong is a rookie mistake—75% of first-time users do it. That leads to foam floods, leaks, and ruined beer. Installation Parts Supply offers compatibility charts and video guides to help you get it right.
Even “universal” styles need to correspond with your keg’s standards. Using the wrong coupler can harm both your pour and your gear.
Which Keg Coupler Is Right for You?
Not all keg connections are created equal—some are designed for specific brews. Using the proper coupler keeps your beer fizzy and flavorful. Follow this guide to choose the right one.
Standard D System Coupler
This is the go-to for 85% of North American craft beers. The one-valve mechanism snaps firmly into place. Quick hint: Find the “Sankey” imprint on it.
Nitro (U) Coupler
The harp emblem identifies it for nitrogen blends like Guinness. Nitro beers rely on its special gas ratio for a silky head. Don’t jam a U-style onto a regular keg—no proper seal results.
Reverse-Thread S System Coupler
Imports from Europe require this S-system coupler. The left-hand twist prevents mix-ups with D Systems. Fun fact: It’s slightly taller than its American cousin.
Specialty European Couplers
Certain European brews need these specific coupler types:
- A System: Used on Warsteiner & Paulaner barrels. The “slider” mechanism is foolproof.
- G System: Used by UK pubs for Bass and Boddingtons. Found in pubs throughout Britain.
- M System: Secures Schneider Weisse barrels. Its click-lock ensures it’s seated.
Their guide highlights D in green, U in black, S in blue. A Midwest microbrewery saved $3,000 yearly by switching to correct couplers. Never rely on “universal”—real compatibility wins.
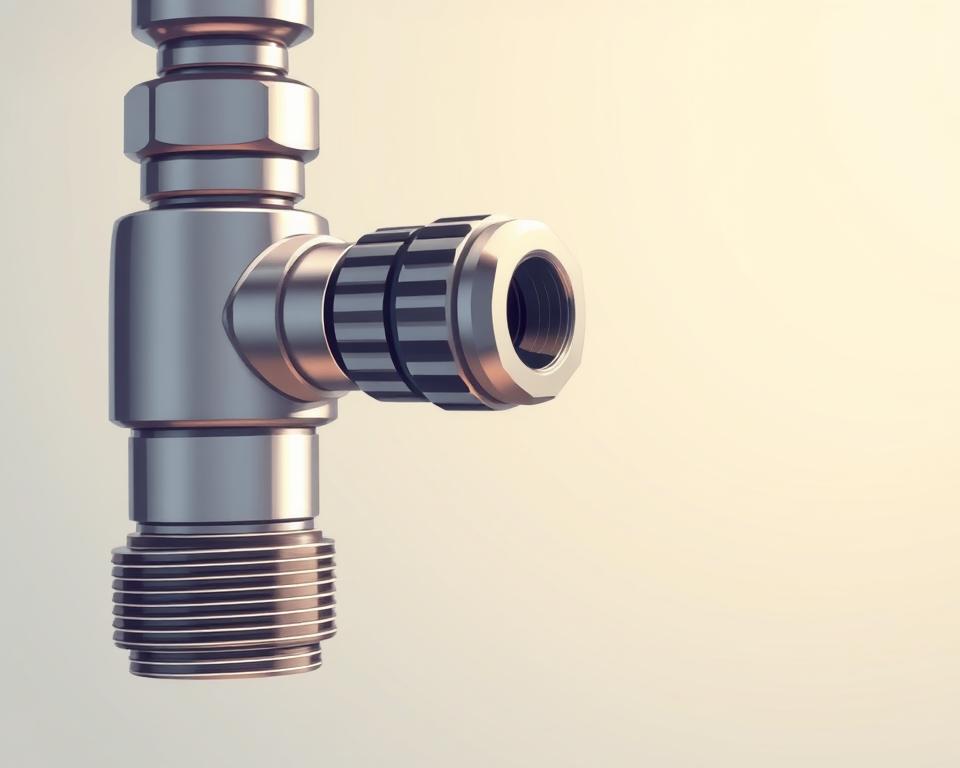
Coupler Parts Breakdown
That perfect pour depends on finely tuned parts. Together, they keep carbonation in and foam out. Below are the parts you need to know.
Coupler Probe & Check Valve
A stainless probe punctures the seal to regulate flow. Premium models last 3x longer than economy versions. Below it, the check valve blocks backflow—Installation Parts Supply’s most-replaced part.
Nut and Washer Assembly
Everything tightens up around the hex nut. Brass suits budgets, but stainless steel resists corrosion. Use nitrile washers in the cold—EPDM fails below 40°F.
| Part | Material | Key Benefit |
|---|---|---|
| Coupler Probe | SS | Resists wear |
| Return Valve | Food-grade plastic | Stops foam issues |
| Coupler Nut | Brass/Stainless | Balances cost/durability |
Gas & Beer Ports
Gas ports manage 20–30 PSI of CO₂ or nitrogen. Incorrect pressure spells foam issues. Stick to 3/16″ ID beer lines for smooth pours. Rebuild kits with FDA seals simplify maintenance.
Pro Tip: Swap O-rings every 6 months or 50 kegs. A cheap washer swap saves you from a costly rebuild.
Setting Up Your Coupler
Install correctly for flawless drafts. Proper installation prevents foam, leaks, and flat beer. Use this step-by-step for a seamless install.
Connecting the Coupler to the Keg
Lift the handle and align the coupler’s lugs with the keg’s slots. Turn clockwise until snug—over-tightening damages the seal. Choose low-profile to gain 4–5″ clearance.
Our wrench sets hex nuts to the ideal 8-10 ft-lb. Eighty percent of leaks stem from a crooked probe. New washers keep your system sealed.
Line Connections
Use 5/16″ MFL fittings to attach the gas line. Apply thread sealant to prevent CO₂ leaks. For beer lines, 10–12 feet of 3/16″ tubing balances pressure drop.
| Step | Tool | Tip |
|---|---|---|
| CO₂ Line | Pipe dope | Check with 30 PSI leak test |
| Beer Line | Pipe cutter | Keep ends square for seals |
| Leak Test | Leak detector | Monitor for a full day |
Some setups include apps that track pressure live. A Denver brewery cut foam by 40% using quick-connects from Installation Parts Supply. Stop the CO₂ at the source for serious leaks.
Coupler Troubleshooting
Nothing ruins a cold beer faster than foam spraying everywhere. Identify these key spots and you’ll solve most pour problems. Below are common faults and quick fixes.
Foam & Leak Fixes
Foam is blamed in nearly 70% of draft problems. Start by checking your temperature—ideally 38°F for most ales. Too warm, and CO₂ escapes too fast.
Check each draft line connection next. A soapy water solution reveals gas leaks through bubbles. Use a wrench to snug loose parts, avoiding over-torque.
- Check ball may hiss and interrupt flow
- Not sure on PSI? Use this guide:
| Beer Type | CO₂ Pressure | N₂ Ratio |
|---|---|---|
| Lagers | 10–12 | N/A |
| Nitro Stouts | 25–30 | 75% nitrogen |
Loose Coupler Issues
If your coupler fits loosely, first check for worn O-rings. Replacing seals corrects about 40% of these problems. Bent coupler heads sometimes require new units.
For uneven surfaces, try keg shims. A few dollars in shims cures tilt issues. Low-profile models solve clearance problems in compact coolers.
Pro Tip: Their emergency washer kit contains five critical seals. Staff who learned these tips reduced waste by nearly 20% in Chicago.
Remember—frost on your CO₂ tank signals overuse. Let it thaw before adjusting pressure relief valves. Digital gauges need yearly calibration for accuracy.
Coupler Cleaning & Care
Clean lines equal better-tasting beer. Residue can dull taste and impede flow. Regular care preserves performance.
Coupler Teardown
Start by taking apart the coupler. Separate the handle, probe, and check valve. Soak all parts in warm water with 1 oz of PBW per gallon for 15–20 minutes. This removes yeast and hop oils.
Our brushes get into the smallest crevices. Don’t forget the ball valve—it accumulates debris. Flush well to prevent soap residue.
Cleaning Products
Powdered Brewery Wash excels at safe cleaning. Acid cleaners work faster but can damage rubber over time. For commercial setups, ultrasonic systems blast away debris with sound waves.
- Drying: Blow dry or wipe with a microfiber towel.
- Sanitizing: Follow FDA CFR 117 guidelines—30 seconds of contact time kills bacteria.
- Logs: Use a log sheet to record each cleaning.
UV sanitation guards seals longer. Always neutralize wastewater—PBW is alkaline and harms pipes. A little effort ensures quality pours and extends your system’s life.
Final Thoughts
Enjoy crisp, fresh beer by mastering your draft beer system. Matching the right hardware, regular cleaning, and proper setup make all the difference. Installation Parts Supply backs you with expert help and discount rebuild kits.
Fun fact: Careful maintenance adds up to 7 extra years of service. Grab the free compatibility guide or sign up for a pro webinar. An annual check-up guarantees smooth service—just listen to customers with five years of trouble-free use.
Ready to upgrade? Visit Installation Parts Supply today and raise your home bar game.